Google Assistant on the Voice Bonnet
Overview
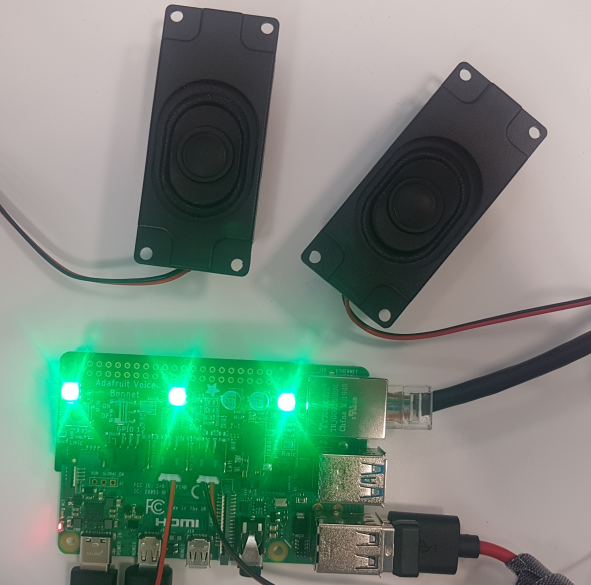
You can set up your own Google Assistant with just a Raspberry Pi and an Adafruit Voice Bonnet. You through setting up the Google Assistant API you can install a few library, enable permissions and get the Google Assistant running on the RPi. Now you can ask Google what you want with the simple push of a button.
Ingredients
In order to follow this recipe you will need:
- A Raspberry Pi 4 or RPi4
- A Adafruit Voice Bonnet
- Two Mono Enclosed Speaker or headphones
- A Google account
Raspberry Pi Setup
The first step is perform an update/upgrade and install the cross-platform package manager pip:
pi@raspberrypi:~ $ sudo apt-get update
pi@raspberrypi:~ $ sudo apt-get -y upgrade

pi@raspberrypi:~ $ sudo apt-get install -y python3-pip
pi@raspberrypi:~ $ sudo pip3 install --upgrade setuptools
Blinka Setup
Blinka is a CirciutPython library compatibility layer. It requires just a few commands to run:
pi@raspberrypi:~ $ cd ~
pi@raspberrypi:~ $ sudo pip3 install --upgrade adafruit-python-shell
pi@raspberrypi:~ $ wget https://raw.githubusercontent.com/adafruit/Raspberry-Pi-Installer-Scripts/master/raspi-blinka.py
pi@raspberrypi:~ $ sudo python3 raspi-blinka.py
When it finishes, it will ask you if you would like to reboot. Choose yes
You install DotStart library to controlling the 3 on-board DotStar LEDs:
pi@raspberrypi:~ $ pip3 install --upgrade adafruit-circuitpython-dotstar adafruit-circuitpython-bmp280
Check I2C and SPI
To verify that the script had enable I2C and SPI, run the following command:
pi@raspberrypi:~ $ ls /dev/i2c* /dev/spi*
You sould see the next response:

If you need another hardware SPI port, you can enable it by adding the line dtoverlay=spi1-3cs to the bottom of boot/config.txt and rebooting.
Audio Setup
Install Voicecard software
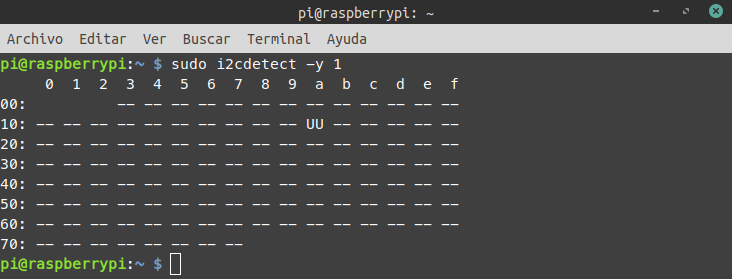
You run sudo i2cdetect -y 1 and you should see an entry under 1a. If you already installed software the number appear as UU, as show in the image.
At the commands like run:
pi@raspberrypi:~ $ sudo apt-get install -y git
pi@raspberrypi:~ $ git clone https://github.com/HinTak/seeed-voicecard
pi@raspberrypi:~ $ cd seeed-voicecard
pi@raspberrypi:~ $ git checkout v5.5
pi@raspberrypi:~ $ sudo ./install.sh
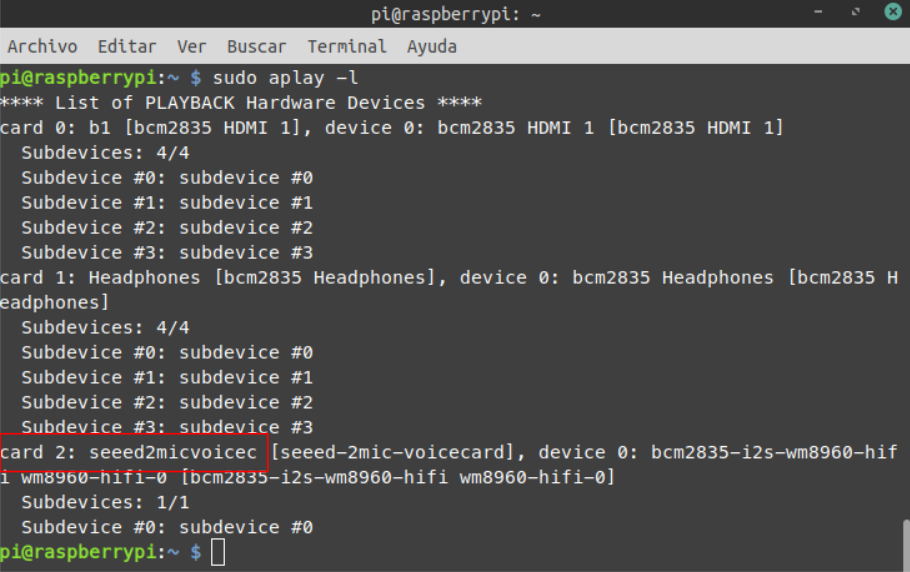
When it finishes reboot and on reboot run sudo aplay -l to list all sound cards. You should see it at the bottom:
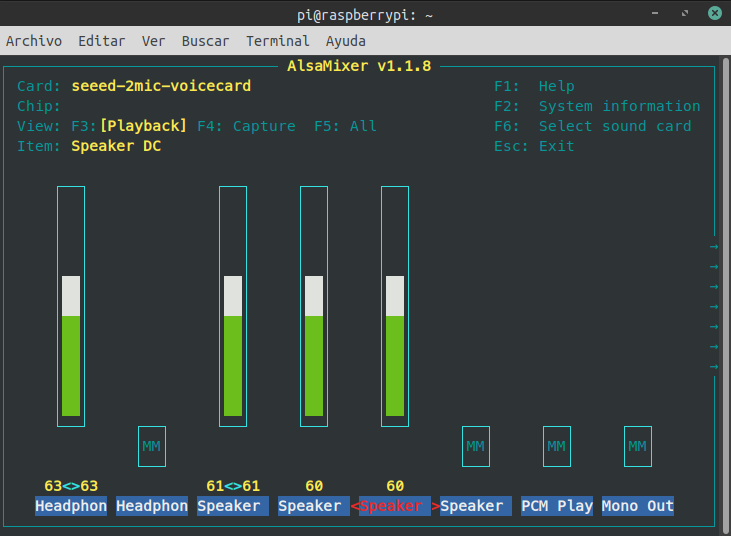
You can user alsamixer to adjust the volume. Select the card with F6
Headphone/Speaker Test
Make sure the audio on/off switch is set to on. Run speaker-test -c2 and you will hear white noise.
Microphone Test
Run sudo arecord -f cd -Dhw:2 | aplay -Dhw:2. Then speak to hear yourself echoed.
Google Setup
Project Creation
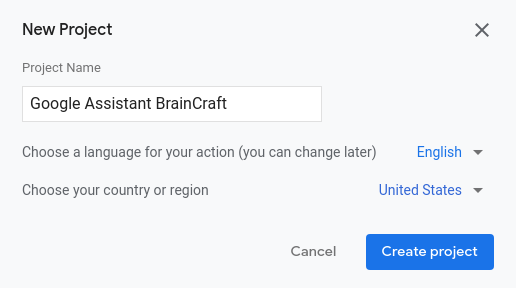
Start by going to https://console.actions.google.com/ and create New Project.
Enter a project name such as Google Assistant BrainCraft and click on Create Project.
At the bottom of the page, click on the link to go to device registration.

Device Registration
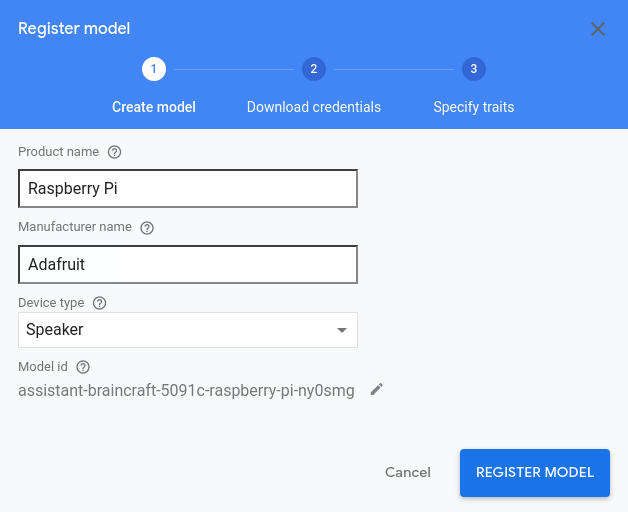
Click the register model button. Fill in the fields with the requested information. For device type, choose Speaker. Click the register moddel button.
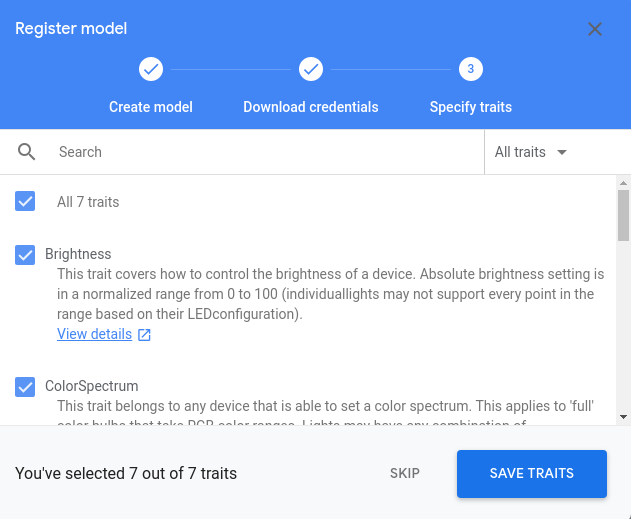
Click Download OAuth 2.0 credentials and save the JSON file as client_secret.json. You will upload this to your Raspberry Pi in a later step. Click Next. Under traits, click All 7 traits and then click Save Traits.
Google Assistant API Setup
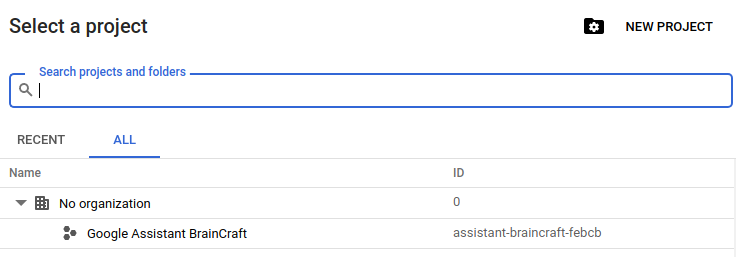
Go to the Google Developers Console to enable the API at https://console.developers.google.com/apis/api/embeddedassistant.googleapis.com/overview. Click on the project selector at the top. Then, select the project.
Click on the Enable button. Once it is enabled, you will be taken to the Overview Screen. Click on the Credentials tab on the left and then click the Configure Consent Screen button on the right. For user type, select External and click create.
Then, enter an application name, this is is the name that will appear on the permissions screen. Select a support email, this is the email that will appear when you click on the application name on the permissions screen. Finally, click save.
Enabling Permissions
Go to activity controls at https://myaccount.google.com/activitycontrols. Make sure web and app activity is on. Also make sure to select the include chrome history and activity from sites, apps, and devices that use google services; this is the first checkbox. An additional dialog may pop up asking you to confirm, click the Turn on button.
Device Setup
Upload the client_secret.json credentials file and place it in your home directory on RPi. Next, you are going to check that you have the required packages and setup a virtual environment
pi@raspberrypi:~ $ cd ~
pi@raspberrypi:~ $ sudo apt-get update
pi@raspberrypi:~ $ sudo apt-get install python3-dev python3-venv
pi@raspberrypi:~ $ python3 -m venv env
pi@raspberrypi:~ $ env/bin/python -m pip install --upgrade pip setuptools wheel
pi@raspberrypi:~ $ source env/bin/activate
Install the Authorization library:
pi@raspberrypi:~ $ sudo apt-get install portaudio19-dev libffi-dev libssl-dev
pi@raspberrypi:~ $ python -m pip install --upgrade google-assistant-sdk[samples]
pi@raspberrypi:~ $ python -m pip install --upgrade google-auth-oauthlib[tool]
Generating an OAuth Token
Run the following command:
pi@raspberrypi:~ $ google-oauthlib-tool --scope https://www.googleapis.com/auth/assistant-sdk-prototype --save --headless --client-secrets ~/client_secret.json
The script should provide a URL to visit to generate the token. Go ahead and click on the Advanced link. After that, it will come up with a confirmation dialog, go ahead and click on Allow. Finally, you will be given an Authorization Code; click on the Copy icon and paste the authorization on your terminal. Code back into the script and the token will be generated and saved.
Usage
First make sure you’re in the virtual environment. If you aren’t run source env/bin/activate.
Next, run the following command
pi@raspberrypi:~ $ wget https://raw.githubusercontent.com/adafruit/Adafruit_Learning_System_Guides/master/BrainCraft_Google_Assistant/gv_buttontotalk.py
And run the script, type python3 gv_buttontotalk.py. At the beggining the leds are red so click the button and the leds should turn green, meaning it’s waiting for you to give it ask a question.