Integrating Xiaomi Mi Band 4 devices with smart mirror
Overview
Mi Band 4 is the most popular and best-selling smart band of the famous IT company Xiaomi. It provides several information about our physical activity like number of steps or heart rate. This device is linked with our smartphone, which access to its data using Bluetooth LE. Using this mechanism, and with a Raspberry Pi transformed into a smart mirror, we can monitorize this information and present it with graphs and other intuitive forms of displaying its progression through time.
Ingredients
In order to follow this recipe you will need:
- A Xiaomi Mi Band 4 device or MB4.
- A Raspberry Pi 4 or RPi4.
- A PostgreSQL database with remote connections allowed. It could be located on the cloud or run locally. See Appendix 1: Configuration for local database.
- The
miband-dcpackage on your RPi4, which is our data collector, available in ARCO package repository. - The
miband-grafanapackage on your PC, which will configure Grafana, also available in ARCO package repository. - Basic knowledge of
linux.
Configuring miband-dc
The data collector, or miband-dc, is a service running always in our device with systemd, we can see its status with the following command:
pi@raspberry:~/$ systemctl status miband-dc.service
● miband-dc.service - miband-dc service
     Loaded: loaded (/lib/systemd/system/miband-dc.service; enabled; vendor preset: enabled)
     Active: active (running) since Wed 2020-12-02 19:08:34 CET; 4s ago
   Main PID: 22377 (miband-dc)
      Tasks: 3 (limit: 9362)
     Memory: 12.6M
     CGroup: /system.slice/miband-dc.service
             └─22377 /usr/bin/python3 /usr/bin/miband-dc -d devices.csv -c settings.json

dic 02 19:08:34 raspberry systemd[1]: Started miband-dc service.
But it needs configuration to work properly.
Database
The service needs a database to store the collected data. It reads the connection parameters from the file /etc/miband-dc/settings.json. An example is:
{
    "db_name": "user-stadistics",
    "db_user": "miband-dc",
    "db_passwd": "mysecret",
    "db_host": "postgresql.on.cloud.com",
    "db_port": 5432
}
It is really important that the database user OWNS the database, so it has privileges to create a new table, if needed, and can perform any operation in it.
Devices
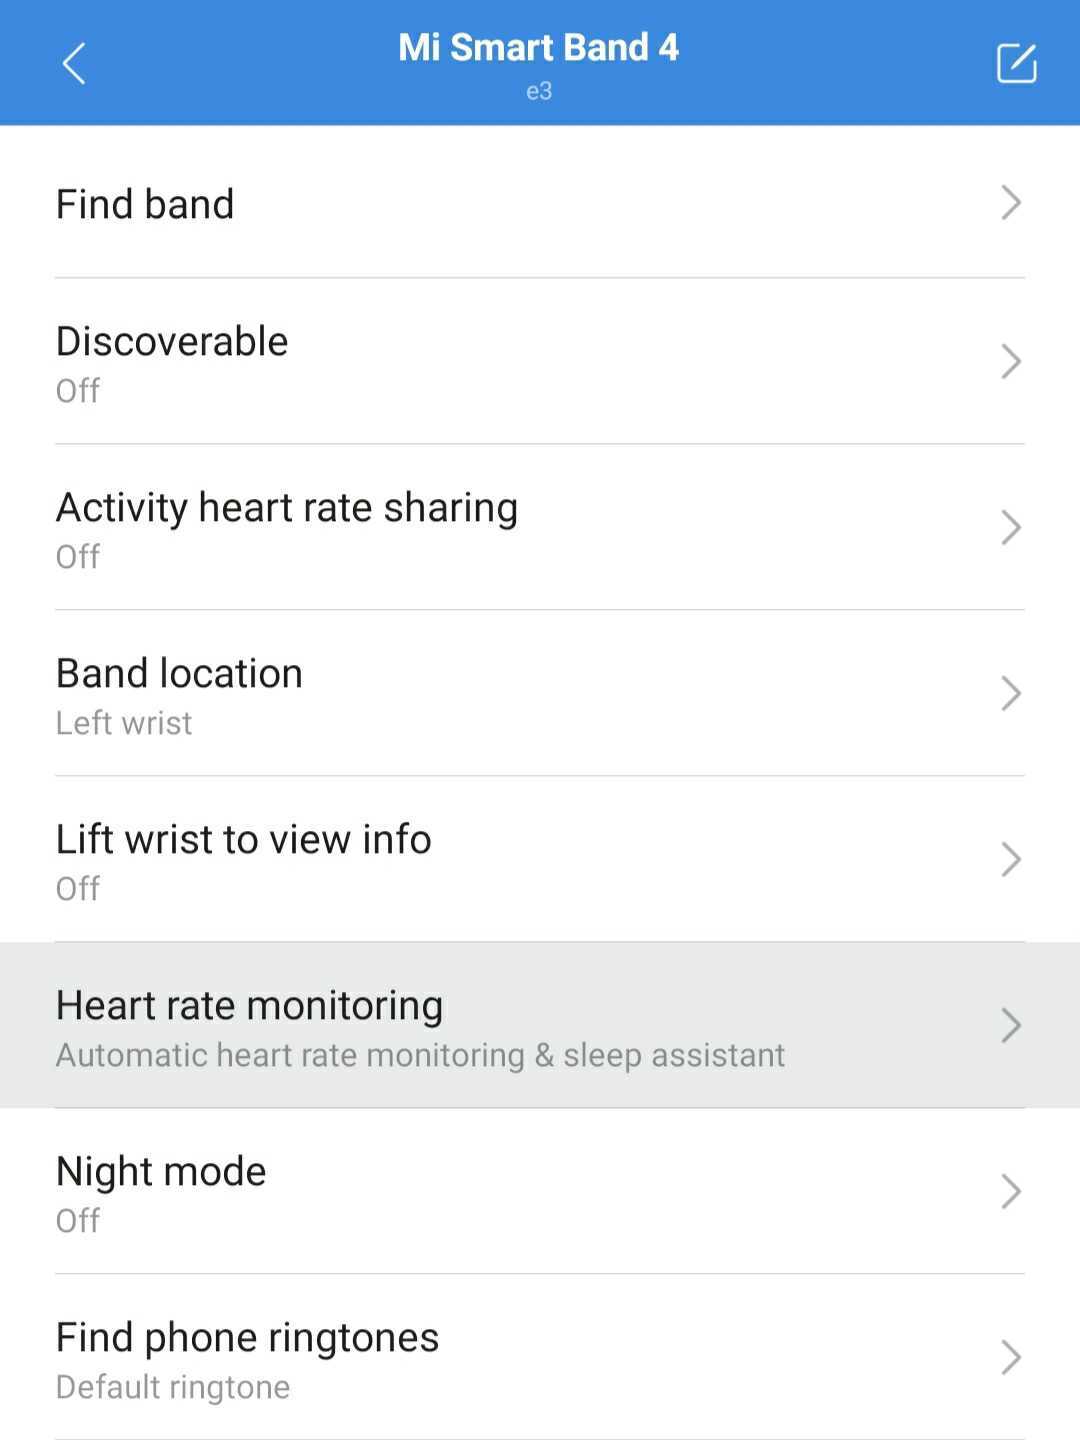
First, the MB4 has to be linked to an account at MiFit App (available on Google Play Store and Apple Store). Register the MB4 following the MiFit instructions. While you are there, enable continous heart rate monitoring:
- Go to link device settings and select ‘heart rate monitoring’.
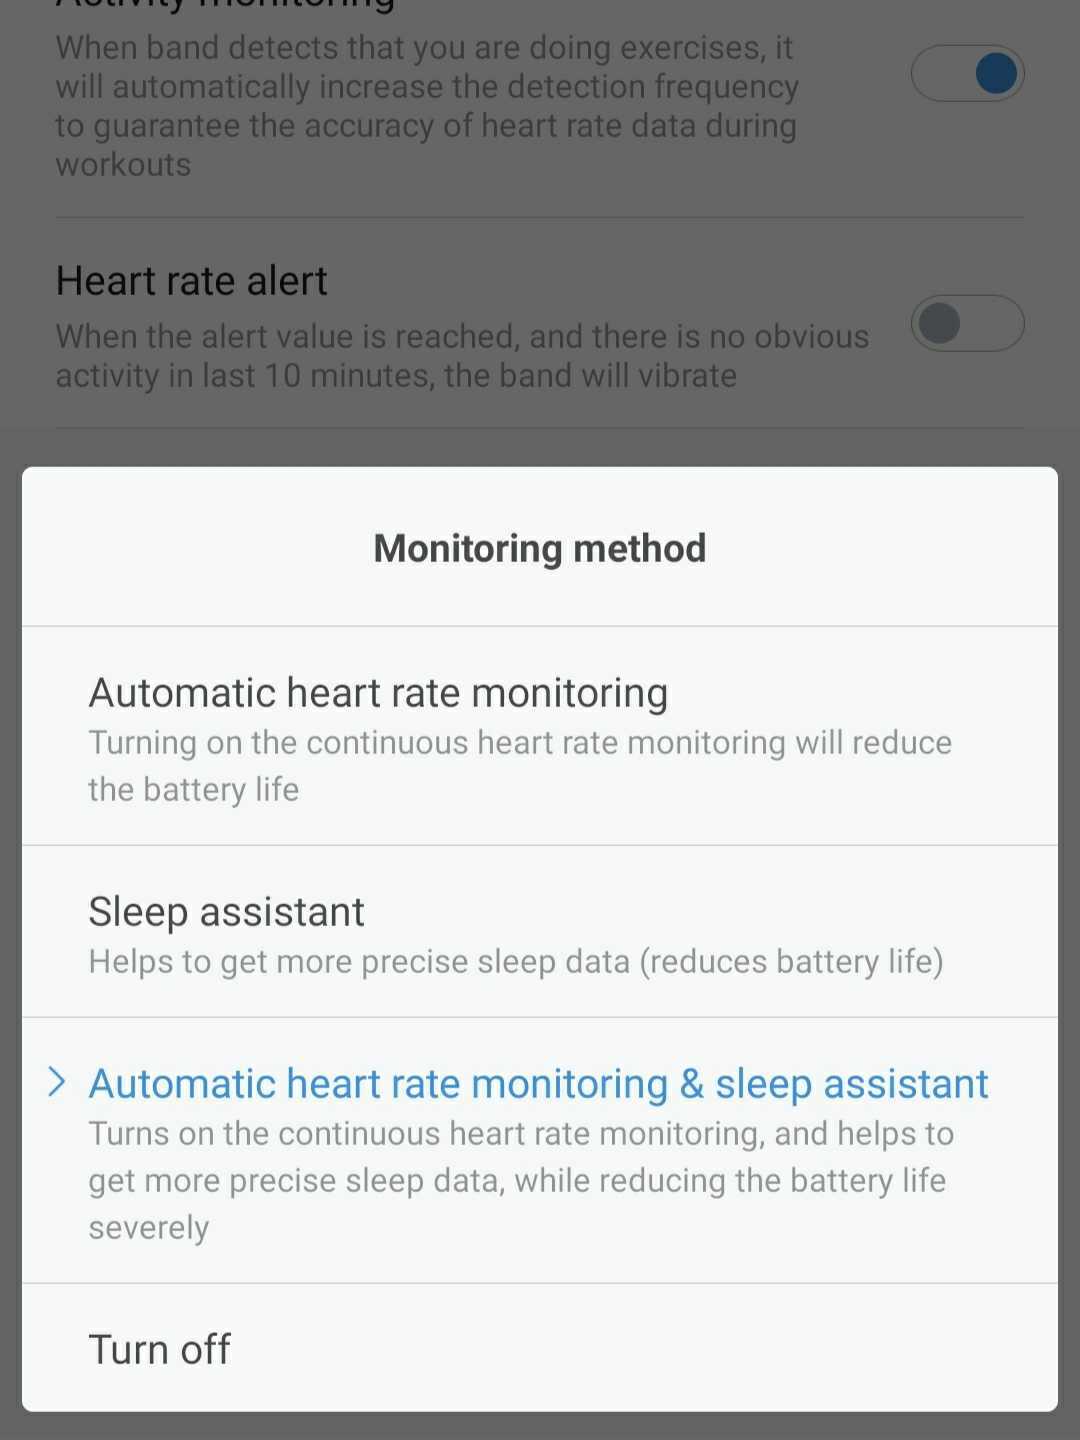
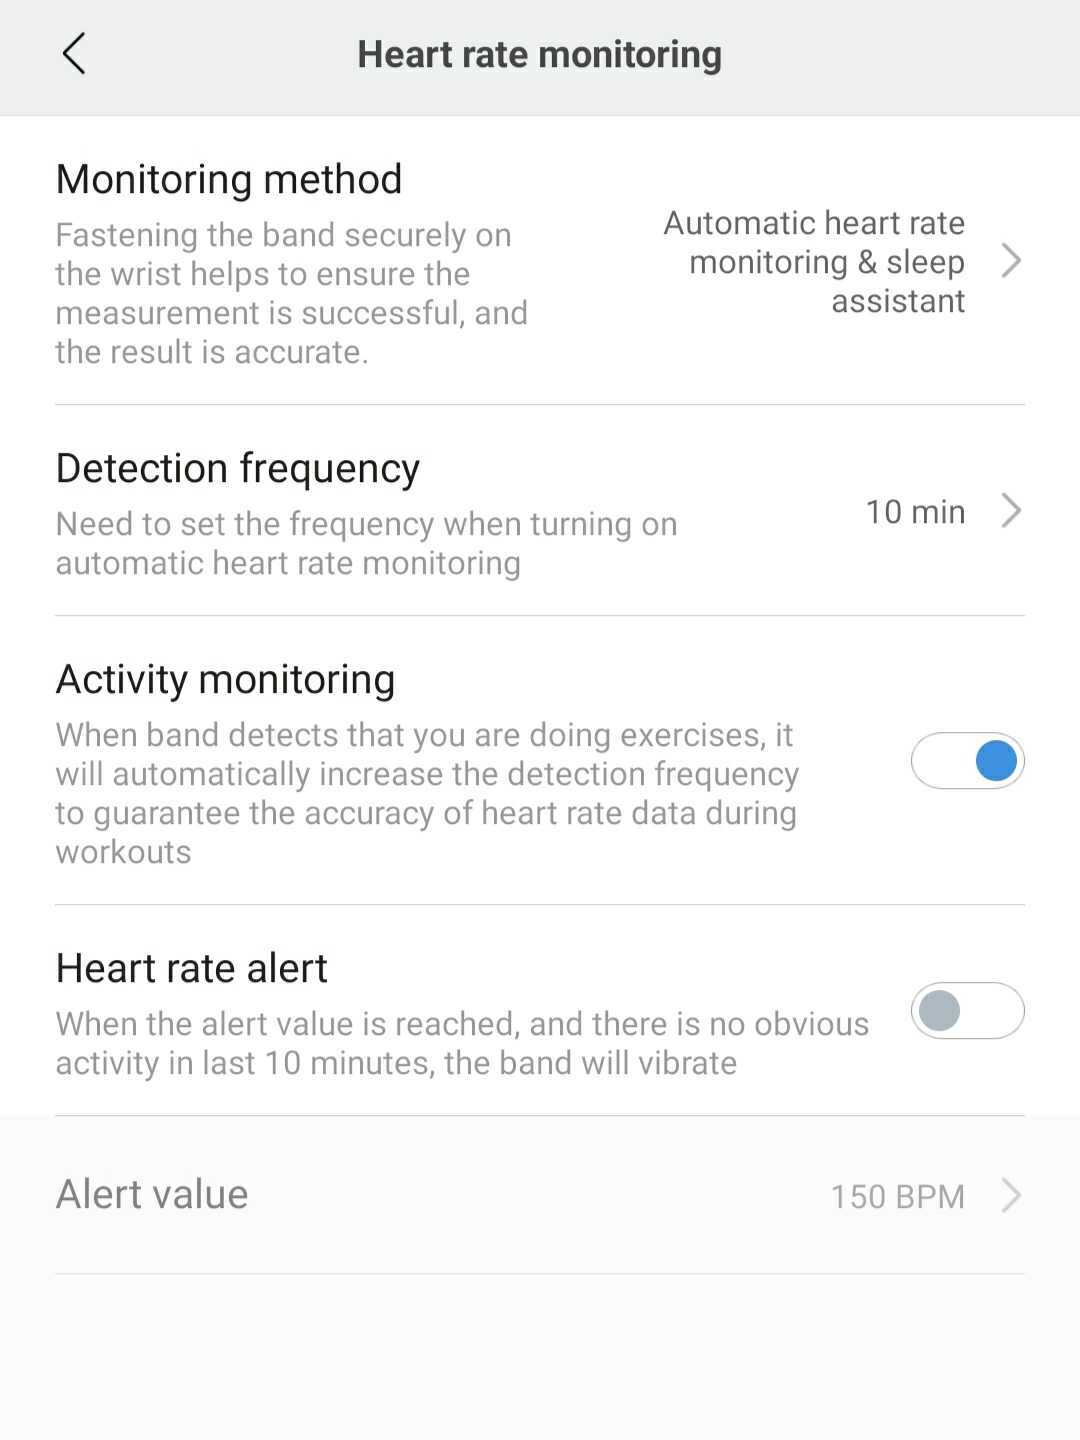
- Set monitoring method to ‘Automatic heart rate monitoring and sleep assistant’.
- Enable activity monitoring.
When finished, turn off your smartphone Bluetooth and do not turn it back while miband-dc is running, as the service will not work properly. Then, store the MB4 information in /etc/miband-dc/devices.csv like:
# id | mac | token
1 | E3:49:01:ED:00:A6 | abc123DEF456ghi789JKL3mnsOPQrst2
The device token can be obtained by using Huami token script with the used account in MiFit credentials. This works for Amazfit accounts, so if you are not sure what type of account you have, we encourage you to create a new one from within MiFit app. An example is:
pi@raspberry:~/$ python3 huami_token.py -m amazfit -e pi@raspberry.com -p mypassword -b
Getting access token with amazfit login method...
Token: ['abcDEFghiJKLmnsOPQrst']
Logging in...
Logged in! User id: 0123456789
Getting linked wearables...
+------------------------------------------------------------------------+
|        MAC        |                      auth_key                      |
|-------------------+----------------------------------------------------|
| E3:49:01:ED:00:A6 |         0xabc123DEF456ghi789JKL3mnsOPQrst2         |  <------ Do not copy the '0x'
+------------------------------------------------------------------------+

Logged out.
It is important to not reset nor unlink the MB4 from your account. If so, just repeat the steps of this section.
Restart service
After all wanted modifications, restart the service and check its status:
pi@raspberry:~/$ sudo systemctl restart miband-dc.service
pi@raspberry:~/$ systemctl status miband-dc.service
● miband-dc.service - miband-dc service
     Loaded: loaded (/lib/systemd/system/miband-dc.service; enabled; vendor preset: enabled)
     Active: active (running) since Wed 2020-12-02 19:14:47 CET; 7s ago
   Main PID: 23417 (miband-dc)
      Tasks: 3 (limit: 9362)
     Memory: 12.6M
     CGroup: /system.slice/miband-dc.service
             └─23417 /usr/bin/python3 /usr/bin/miband-dc -d devices.csv -c settings.json

dic 02 19:14:47 raspberry bash[23417]: INFO:mi band 1: init dev, mac: E3:49:01:ED:00:A6, static-id: None
dic 02 19:14:47 raspberry bash[23417]: DEBUG:TaskRunner: remaining tasks: 0
dic 02 19:14:47 raspberry bash[23417]: INFO:TaskRunner: run task: <Task: DiscoverTask>
dic 02 19:14:47 raspberry bash[23417]: INFO:DiscoverTask: start discovery process...
dic 02 19:14:54 raspberry bash[23417]: INFO:DiscoverTask: - discovered 1 devices
dic 02 19:14:54 raspberry bash[23417]: INFO:DiscoverTask: - got device: <MiBandDev, mac: E3:49:01:ED:00:A6, status: online>
dic 02 19:14:54 raspberry bash[23417]: DEBUG:TaskRunner: remaining tasks: 0
dic 02 19:14:55 raspberry bash[23417]: INFO:TaskRunner: run task: <Task: RunFunctionTask-update_static>
dic 02 19:14:55 raspberry bash[23417]: INFO:mi band 1: connecting to 'E3:49:01:ED:00:A6'...
With the service running, the daemon is storing the MB4 data on the database provided.
Configuring miband-grafana
This package exists to automate the Grafana provision with the data stored by miband-dc. In order to create the correct files, miband-grafana must know the connection parameters of the database, so we must edit its configuration file with sudo miband-grafana -e. A configuration can be:
DBNAME=user-stadistics
DBUSER=grafana
DBPASSWORD=mysecret
DBHOST=postgresql.on.cloud.com
DBPORT=5432
It is really important that the database user has only CONNECT and SELECT privileges, because the queries executed by Grafana cannot be filtered so any user logged on Grafana UI with admin rights could manipulate the database.
Then execute:
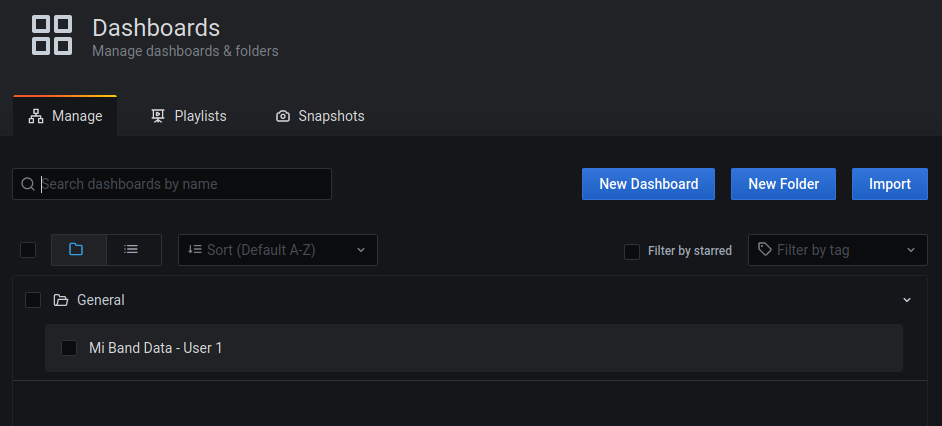
user@pc:~/$ sudo miband-grafana -u
This will provision our local Grafana instance. If we check http://localhost:3000 we will see Grafana UI, and following on the side menu Dashboards > Manage we can see our provisioned dashboards:
To see what files where provisioned and the generated dashboards information use:
user@pc:~/$ sudo miband-grafana -s
INFO: Datasource provider file at /etc/grafana/provisioning/datasources/miband-grafana.yaml
INFO: Dashboard provider file at /etc/grafana/provisioning/dashboards/miband-grafana.yaml
INFO: Found dashboard definition at /var/lib/grafana/dashboards/miband-grafana_dev1.json:
INFO:   Name: mi-band-data-user-1
INFO:   UID: c9b38467
INFO: Available panels:
INFO:   ID: 11  Description: Steps per day
INFO:   ID: 12  Description: Steps today
INFO:   ID: 21  Description: Calories per day
INFO:   ID: 22  Description: Calories today
INFO:   ID: 31  Description: Heart rate
NOTE: If you want grafana to be started on boot, execute sudo systemctl enable grafana-server.service.
Setting up the smart mirror
To transform our RPi4 in a smart mirror we will use Magic Mirror. Following its installation instructions, execute:
pi@raspberry:~/$ curl -sL https://deb.nodesource.com/setup_10.x | sudo -E bash -
pi@raspberry:~/$ sudo apt install -y nodejs
pi@raspberry:~/$ git clone https://github.com/MichMich/MagicMirror
pi@raspberry:~/$ cd MagicMirror
pi@raspberry:~/MagicMirror/$ npm install
pi@raspberry:~/MagicMirror/$ cp config/config.js.sample config/config.js
Once this is done, it is time to add our Grafana module for Magic Mirror, called MMM-GrafanaEmbed:
pi@raspberry:~/MagicMirror/$ cd modules
pi@raspberry:~/MagicMirror/modules/$ git clone https://bitbucket.org/arco_group/mmm-grafanaembed.git MMM-GrafanaEmbed
It is really important that the final folder is called MMM-GrafanaEmbed, respecting the capital letters.
Finally, we change Magic Mirror configuration /MagicMirror/config/config.js adding MMM-GrafanaEmbed parameters on modules list. For example:
modules: [
    // Rest of modules configuration
    {
        module: 'MMM-GrafanaEmbed',
        position: 'bottom_center',
        config: {
            host: "192.168.0.22",   // Our PC IP address
            dash_id: 'c9b38467',    // Dashboard uid gotten from miband-grafana -s
            dash_name: 'mi-band-data-user-1',    // Dashboard name gotten from miband-grafana -s
            panels: [11]    // Panel ids for number of steps gotten from miband-grafana -s
        }
    }
]
Then we run the following command and we will bring our Grafana panel to Magic Mirror:
pi@raspberry:~/MagicMirror/$ npm run start

Troubleshooting
Grafana is not installable
Using the apt program, it can occur that Grafana package is not installable. This is because apt cannot find the source package within its sources lists. To solve this problem, execute the following commands:
user@pc:~/$ sudo apt-get install -y apt-transport-https software-properties-common wget
user@pc:~/$ wget -q -O - https://packages.grafana.com/gpg.key | sudo apt-key add -
user@pc:~/$ echo "deb https://packages.grafana.com/oss/deb stable main" | sudo tee -a /etc/apt/sources.list.d/grafana.list
user@pc:~/$ sudo apt-get update
Now you can install miband-grafana normally, as apt can find Grafana package now.
Grafana service is not running after provisioning
Sometimes, after we run miband-grafana -u, the Grafana service, grafana-server, stops running and its log does not offer any relevant information about what went wrong with the provision. Do not modify any of the generated files by miband-grafana, they are properly tested, so the problem is with Grafana instance. For the time being, reinstalling Grafana works. So execute:
user@pc:~/$ sudo apt purge grafana                      // Warning: This uninstalls miband-grafana package
user@pc:~/$ sudo rm -drf /etc/grafana /var/lib/grafana  // Dpkg do not remove those if there were custom files on them, so do it manually
user@pc:~/$ sudo apt install miband-grafana             // Reinstall miband-grafana and grafana
user@pc:~/$ sudo miband-grafana -u                      // Try again!
miband-dc: No detection of devices
There are some issues with the Bluetooth service that we are not capable of locate yet. miband-dc is programmed to auto-restart the RPi4 Bluetooth service when it does not detect any configured device (the ones specified at devices.csv) within 15 minutes.
If it still does not detect your device, you must restart the Bluetooth adaptor. You can do it using the UI, selecting the proper option at the Bluetooth icon up to the right of your screen, or via command-line with sudo hciconfig hci0 reset.
miband-dc: ‘Are you root?’ error
miband-dc is running with admin privileges by systemctl, so it is running as root. The problem seems to be related with the Bluetooth adaptor, so a temporary solution is to restart the Bluetooth adaptor, just as is explained in the previous section.
References
- Grafana
- Magic Mirror
miband-dc(1)miband-grafana(1)- MMM-GrafanaEmbed
Appendix 1. Configuration for local database
If we have installed PostgreSQL locally, either in our RPi4 or in our PC, we must ensure they are in the same network or both hosts have public IP addresses. In these scenarios, either Grafana instance, in our PC, or miband-dc, in our RPI4, will have to access the database, so we must change PostgreSQL configuration to allow remote connections.
First, we will change the value of listen_addresses to ’*’ in the file postgresql.conf. If we execute SHOW config_file in our PostgreSQL instance we will know its location. For example:
user@pc:~/$ sudo su postgres -c "psql -c 'SHOW config_file'"
               config_file
-----------------------------------------
 /etc/postgresql/12/main/postgresql.conf
(1 row)

user@pc:~/$ sudo grep -n listen_addresses /etc/postgresql/12/main/postgresql.conf
59:#listen_addresses = 'localhost'              # what IP address(es) to listen on;
We will change, in the line 59, ’localhost’ for ‘*’ and uncomment the line.
Next we will open the file pg_hba.conf, whose path is specified in postgresql.conf with the hba_file parameter), and add the next line:
# ORIGINAL CONFIGURATION - DO NOT DELETE
# [...]
# TYPE  DATABASE        USER            ADDRESS                 METHOD
host    database        user            samenet                 md5
Replace the parameter database with the name of the database, user-stadistics in this recipe.
In case your database is hosted by your RPi4, the remote user will be the one used by the Grafana instance, grafana in this recipe. If this host is not in the same net as your RPi4, replace samenet parameter with the public IP address of the Grafana host.
If that was not the case and the database is located in your PC, the remote user will be the one used by miband-dc program running on the RPi4, miband-dc in this recipe. If this host is not in the same net as your PC, replace samenet parameter with the public IP address of the miband-dc host.